Showing posts with label Windows. Show all posts

Wednesday, 14 September 2016

Windows Server 2012 All In One R2 Pre-Activated (x64)

Cover Windows Server 2012 AIO R2

INFO

Title : Windows Server 2012 All In One R2 Pre-Activated (x64)
Developer : Microsoft
Release Date : October 17, 2013 (Build 6.3.9600)
License : Full Version

SCREENSHOTS


MINIMUM SYSTEM REQUIREMENTS
  • CPU : INTEL 1GHz / AMD 1GHz
  • Version : 64Bit
  • RAM : 2GB
  • GPU : 128MB
  • DirectX: 9.0c
  • HDD : 20GB

DOWNLOAD

Language: English
Size: 4.23GB

FILESCDN

| Windows Server 2012 R2 AIO Pre-Activated (x64).Torrent |

NOTE: This release is Pre-Activated.

HOW TO MAKE A FLASH DRIVE/USB KEY MANUALLY:
  • Typing "diskpart" (Don't need quotes) at the Start Menu.
  • Typing "list disk" (Don't need quotes) //command to find the drive with appropriate size.
  • Typing "select disk 1" (Don't need quotes) //where the "1" is actually the corresponding number of your USB drive. Make sure you choose the correct flash drive if you have more than one of the same size.
  • Typing "clean" (Don't need quotes) //removes all partitions.
  • Typing "create partition primary" (Don't need quotes) //bootable partition.
  • Typing "active" (Don't need quotes).
  • Typing "format fs=ntfs quick" (Don't need quotes) //can use fat32 if all files on drive are something like 3gb or smaller. You should not need a boot sector on a usb drive, most motherboards allow booting to usb drives.
  • Typing "assign" (Don't need quotes) //command gives the USB drive a drive letter, making it easy to access from Windows Explorer.
  • You are done with diskpart, type "exit" (Don't need quotes).

Then you can copy everything from the Windows Server 2012 installation DVD/ISO onto the USB key (a simple drag and drop will do). I would not reccommend extracting directly from DVD/ISO to flash drive. It will take forever, and burn up your drive. Instead, extract to hard drive first, then copy or cut/paste to the drive. Make sure you do not put the files in a subdirectory or the drive will not boot.

when installing from USB boot and enter bios setup (usually DEL/F2 key on bootup) Find where it lists the hard disk boot order. (usually some kind of boot section) Select hard disks and put the usb drive at the top of the queue with the C drive you install to just below it. Save and exit bios (usually F10).

The installation will now proceed as usual—but faster. You can remove the usb flash drive after the first setup reboot, it won't use it anymore.

Windows Server 2008 All In One R2 SP1 Pre-Activated (x64)

Cover Windows Server 2008 AIO R2 SP1

INFO

Title : Windows Server 2008 All In One R2 SP1 Pre-Activated (x64)
Developer : Microsoft
Release Date : February 22, 2011 (Build 6.1.7601 : Service Pack 1)
License : Full Version

SCREENSHOTS


MINIMUM SYSTEM REQUIREMENTS
  • CPU : INTEL 1GHz / AMD 1GHz
  • Version : 64Bit
  • RAM : 2GB
  • GPU : 128MB
  • DirectX: 9.0c
  • HDD : 20GB

DOWNLOAD

Language: English
Size: 3.12GB

FILESCDN

| Windows Server 2008 AIO R2 SP1 Pre-Activated (x64).Torrent |

NOTE: This release is Pre-Activated.

HOW TO MAKE A FLASH DRIVE/USB KEY MANUALLY:
  • Typing "diskpart" (Don't need quotes) at the Start Menu.
  • Typing "list disk" (Don't need quotes) //command to find the drive with appropriate size.
  • Typing "select disk 1" (Don't need quotes) //where the "1" is actually the corresponding number of your USB drive. Make sure you choose the correct flash drive if you have more than one of the same size.
  • Typing "clean" (Don't need quotes) //removes all partitions.
  • Typing "create partition primary" (Don't need quotes) //bootable partition.
  • Typing "active" (Don't need quotes).
  • Typing "format fs=ntfs quick" (Don't need quotes) //can use fat32 if all files on drive are something like 3gb or smaller. You should not need a boot sector on a usb drive, most motherboards allow booting to usb drives.
  • Typing "assign" (Don't need quotes) //command gives the USB drive a drive letter, making it easy to access from Windows Explorer.
  • You are done with diskpart, type "exit" (Don't need quotes).

Then you can copy everything from the Windows Server 2008 installation DVD/ISO onto the USB key (a simple drag and drop will do). I would not reccommend extracting directly from DVD/ISO to flash drive. It will take forever, and burn up your drive. Instead, extract to hard drive first, then copy or cut/paste to the drive. Make sure you do not put the files in a subdirectory or the drive will not boot.

when installing from USB boot and enter bios setup (usually DEL/F2 key on bootup) Find where it lists the hard disk boot order. (usually some kind of boot section) Select hard disks and put the usb drive at the top of the queue with the C drive you install to just below it. Save and exit bios (usually F10).

The installation will now proceed as usual—but faster. You can remove the usb flash drive after the first setup reboot, it won't use it anymore.

Windows Server 2003 Enterprise R2 SP2 (x86)


INFO

Title : Windows Server 2003 Enterprise R2 SP2 (x86)
Developer : Microsoft
Release Date : March 13, 2007 (Build 3790: Service Pack 2)
License : Full Version

SCREENSHOTS


MINIMUM SYSTEM REQUIREMENTS
  • CPU : INTEL Pentium 233MHz / AMD 233MHz
  • Version : 32Bit
  • RAM : 64MB
  • HDD : 900MB

DOWNLOAD

Language: English
Size: 743MB

UPLOADS

| Windows Server 2003 Enterprise R2 SP2 (x86).iso |

FILESCDN

| Windows Server 2003 Enterprise R2 SP2 (x86).torrent |


PRODUCT KEY: C4HH9-J98JF-WDWQW-4GTDW-49XWG

                       KVV9C-CCGFP-THM6D-DY4KF-6JD3T

                       GFG8D-TBT6Q-Y77B9-FKKJ9-93BQY

HOW TO MAKE A FLASH DRIVE/USB KEY MANUALLY:
  • Typing "diskpart" (Don't need quotes) at the Start Menu.
  • Typing "list disk" (Don't need quotes) //command to find the drive with appropriate size.
  • Typing "select disk 1" (Don't need quotes) //where the "1" is actually the corresponding number of your USB drive. Make sure you choose the correct flash drive if you have more than one of the same size.
  • Typing "clean" (Don't need quotes) //removes all partitions.
  • Typing "create partition primary" (Don't need quotes) //bootable partition.
  • Typing "active" (Don't need quotes).
  • Typing "format fs=ntfs quick" (Don't need quotes) //can use fat32 if all files on drive are something like 3gb or smaller. You should not need a boot sector on a usb drive, most motherboards allow booting to usb drives.
  • Typing "assign" (Don't need quotes) //command gives the USB drive a drive letter, making it easy to access from Windows Explorer.
  • You are done with diskpart, type "exit" (Don't need quotes).

Then you can copy everything from the Windows Server 2003 installation DVD/ISO onto the USB key (a simple drag and drop will do). I would not reccommend extracting directly from DVD/ISO to flash drive. It will take forever, and burn up your drive. Instead, extract to hard drive first, then copy or cut/paste to the drive. Make sure you do not put the files in a subdirectory or the drive will not boot.

when installing from USB boot and enter bios setup (usually DEL/F2 key on bootup) Find where it lists the hard disk boot order. (usually some kind of boot section) Select hard disks and put the usb drive at the top of the queue with the C drive you install to just below it. Save and exit bios (usually F10).

The installation will now proceed as usual—but faster. You can remove the usb flash drive after the first setup reboot, it won't use it anymore.

Windows 10 All In One (x86x64)

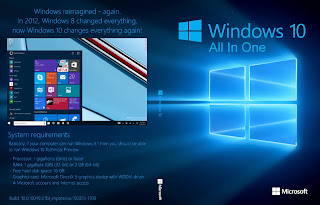
Cover Windows 10 AIO

INFO

Title : Windows 10 All In One (x86x64)
Developer : Microsoft
Release Date : May 10, 2016 (Build 10586.318 : Version 1511)
License : Full Version

SCREENSHOTS


MINIMUM SYSTEM REQUIREMENTS
  • CPU : INTEL 1GHz / AMD 1GHz
  • Version : 32Bit / 64Bit
  • RAM : 1GB (32Bit) / 2GB (64Bit)
  • GPU : 128MB
  • DirectX: 9.0c
  • HDD : 16GB (32Bit) / 20GB (64Bit)

DOWNLOAD

Language: English
Size: 4.32GB

FILESCDN

| Windows 10 AIO (x86x64).Torrent | Activator Ultimate v1.5 (Permanent) |

NOTE: This release is includes Activator.

HOW TO MAKE A FLASH DRIVE/USB KEY MANUALLY:
  • Typing "diskpart" (Don't need quotes) at the Start Menu.
  • Typing "list disk" (Don't need quotes) //command to find the drive with appropriate size.
  • Typing "select disk 1" (Don't need quotes) //where the "1" is actually the corresponding number of your USB drive. Make sure you choose the correct flash drive if you have more than one of the same size.
  • Typing "clean" (Don't need quotes) //removes all partitions.
  • Typing "create partition primary" (Don't need quotes) //bootable partition.
  • Typing "active" (Don't need quotes).
  • Typing "format fs=ntfs quick" (Don't need quotes) //can use fat32 if all files on drive are something like 3gb or smaller. You should not need a boot sector on a usb drive, most motherboards allow booting to usb drives.
  • Typing "assign" (Don't need quotes) //command gives the USB drive a drive letter, making it easy to access from Windows Explorer.
  • You are done with diskpart, type "exit" (Don't need quotes).

Then you can copy everything from the Windows 10 installation DVD/ISO onto the USB key (a simple drag and drop will do). I would not reccommend extracting directly from DVD/ISO to flash drive. It will take forever, and burn up your drive. Instead, extract to hard drive first, then copy or cut/paste to the drive. Make sure you do not put the files in a subdirectory or the drive will not boot.

when installing from USB boot and enter bios setup (usually DEL/F2 key on bootup) Find where it lists the hard disk boot order. (usually some kind of boot section) Select hard disks and put the usb drive at the top of the queue with the C drive you install to just below it. Save and exit bios (usually F10).

The installation will now proceed as usual—but faster. You can remove the usb flash drive after the first setup reboot, it won't use it anymore.

Windows 8.1 All In One Pre-Activated (x86 x64)

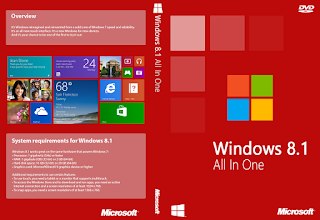
Cover Windows 8.1 AIO

INFO

Title : Windows 8.1 All In One Pre-Activated (x86 x64)
Developer : Microsoft
Release Date : April 8, 2014 (Build 6.3.9600)
License : Full Version

SCREENSHOTS


MINIMUM SYSTEM REQUIREMENTS
  • CPU : INTEL 1GHz / AMD 1GHz
  • Version : 32Bit / 64Bit
  • RAM : 1GB (32Bit) / 2GB (64Bit)
  • GPU : 128MB
  • DirectX: 9.0c
  • HDD : 16GB (32Bit) / 20GB (64Bit)

DOWNLOAD

Language: English
Size: 4.30GB

FILESCDN

| Windows 8.1 AIO Pre-Activated (x86 x64).Torrent | Activator |

NOTE: This release is Pre-Activated. If your PC/Laptop fails to activate, use Activator Windows 8.1.

HOW TO MAKE A FLASH DRIVE/USB KEY MANUALLY:
  • Typing "diskpart" (Don't need quotes) at the Start Menu.
  • Typing "list disk" (Don't need quotes) //command to find the drive with appropriate size.
  • Typing "select disk 1" (Don't need quotes) //where the "1" is actually the corresponding number of your USB drive. Make sure you choose the correct flash drive if you have more than one of the same size.
  • Typing "clean" (Don't need quotes) //removes all partitions.
  • Typing "create partition primary" (Don't need quotes) //bootable partition.
  • Typing "active" (Don't need quotes).
  • Typing "format fs=ntfs quick" (Don't need quotes) //can use fat32 if all files on drive are something like 3gb or smaller. You should not need a boot sector on a usb drive, most motherboards allow booting to usb drives.
  • Typing "assign" (Don't need quotes) //command gives the USB drive a drive letter, making it easy to access from Windows Explorer.
  • You are done with diskpart, type "exit" (Don't need quotes).

Then you can copy everything from the Windows 8.1 installation DVD/ISO onto the USB key (a simple drag and drop will do). I would not reccommend extracting directly from DVD/ISO to flash drive. It will take forever, and burn up your drive. Instead, extract to hard drive first, then copy or cut/paste to the drive. Make sure you do not put the files in a subdirectory or the drive will not boot.

when installing from USB boot and enter bios setup (usually DEL/F2 key on bootup) Find where it lists the hard disk boot order. (usually some kind of boot section) Select hard disks and put the usb drive at the top of the queue with the C drive you install to just below it. Save and exit bios (usually F10).

The installation will now proceed as usual—but faster. You can remove the usb flash drive after the first setup reboot, it won't use it anymore.

Windows 7 All In One SP1 Pre-Activated (x86 x64)

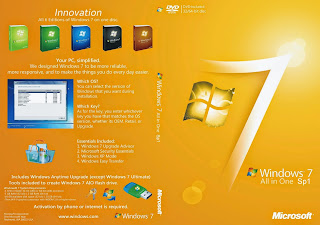
Cover Windows 7 AIO SP1

INFO

Title : Windows 7 All In One SP1 Pre-Activated (x86 x64)
Developer : Microsoft
Release Date : February 22, 2011 (Build 6.1.7601 : Service Pack 1)
License : Full Version

SCREENSHOTS


MINIMUM SYSTEM REQUIREMENTS
  • CPU : INTEL 1GHz / AMD 1GHz
  • Version : 32Bit / 64Bit
  • RAM : 1GB (32Bit) / 2GB (64Bit)
  • GPU : 128MB
  • DirectX: 9.0c
  • HDD : 16GB (32Bit) / 20GB (64Bit)

DOWNLOAD

Language: English
Size: 4.15GB

FILESCDN

| Windows 7 AIO SP1 (x86 x64).Torrent | Activator v1.9.7 | Activator v2.0.6 |

NOTE: This release is Pre-Activated.

HOW TO MAKE A FLASH DRIVE/USB KEY MANUALLY:
  • Typing "diskpart" (Don't need quotes) at the Start Menu.
  • Typing "list disk" (Don't need quotes) //command to find the drive with appropriate size.
  • Typing "select disk 1" (Don't need quotes) //where the "1" is actually the corresponding number of your USB drive. Make sure you choose the correct flash drive if you have more than one of the same size.
  • Typing "clean" (Don't need quotes) //removes all partitions.
  • Typing "create partition primary" (Don't need quotes) //bootable partition.
  • Typing "active" (Don't need quotes).
  • Typing "format fs=ntfs quick" (Don't need quotes) //can use fat32 if all files on drive are something like 3gb or smaller. You should not need a boot sector on a usb drive, most motherboards allow booting to usb drives.
  • Typing "assign" (Don't need quotes) //command gives the USB drive a drive letter, making it easy to access from Windows Explorer.
  • You are done with diskpart, type "exit" (Don't need quotes).

Then you can copy everything from the Windows 7 installation DVD/ISO onto the USB key (a simple drag and drop will do). I would not reccommend extracting directly from DVD/ISO to flash drive. It will take forever, and burn up your drive. Instead, extract to hard drive first, then copy or cut/paste to the drive. Make sure you do not put the files in a subdirectory or the drive will not boot.

when installing from USB boot and enter bios setup (usually DEL/F2 key on bootup) Find where it lists the hard disk boot order. (usually some kind of boot section) Select hard disks and put the usb drive at the top of the queue with the C drive you install to just below it. Save and exit bios (usually F10).

The installation will now proceed as usual—but faster. You can remove the usb flash drive after the first setup reboot, it won't use it anymore.

Windows Vista Home Basic, Premium & Ultimate SP2 Pre-Activated (x86 x64)

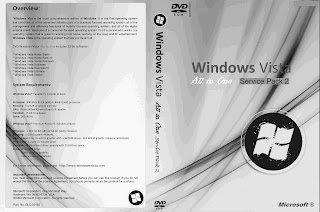
Cover Windows Vista AIO SP2

INFO

Title : Windows Vista Home Basic, Premium & Ultimate SP2 Pre-Activated (x86 x64)
Developer : Microsoft
Release Date : May 26, 2009 (Build 6.0.6002 : Service Pack 2)
License : Full Version

SCREENSHOTS


MINIMUM SYSTEM REQUIREMENTS
  • CPU : INTEL 1GHz / AMD 1GHz
  • Version : 32Bit / 64Bit
  • RAM : 1GB (32Bit) / 2GB (64Bit)
  • GPU : 128MB
  • DirectX: 9.0c
  • HDD : 15GB (32Bit) / 19GB (64Bit)

DOWNLOAD

Language: English
Size: 4.23GB

FILESCDN

| Windows Vista 3in1 SP2 Pre-Activated (x86 x64).Torrent | Activator 4.2 |

NOTE: This release is Pre-Activated. Activated with VistaLoader 4.0, if your PC/Laptop fails to activate, use Backup Activator 4.1 or Activator 4.2.

HOW TO MAKE A FLASH DRIVE/USB KEY MANUALLY:
  • Typing "diskpart" (Don't need quotes) at the Start Menu.
  • Typing "list disk" (Don't need quotes) //command to find the drive with appropriate size.
  • Typing "select disk 1" (Don't need quotes) //where the "1" is actually the corresponding number of your USB drive. Make sure you choose the correct flash drive if you have more than one of the same size.
  • Typing "clean" (Don't need quotes) //removes all partitions.
  • Typing "create partition primary" (Don't need quotes) //bootable partition.
  • Typing "active" (Don't need quotes).
  • Typing "format fs=ntfs quick" (Don't need quotes) //can use fat32 if all files on drive are something like 3gb or smaller. You should not need a boot sector on a usb drive, most motherboards allow booting to usb drives.
  • Typing "assign" (Don't need quotes) //command gives the USB drive a drive letter, making it easy to access from Windows Explorer.
  • You are done with diskpart, type "exit" (Don't need quotes).

Then you can copy everything from the Windows Vista installation DVD/ISO onto the USB key (a simple drag and drop will do). I would not reccommend extracting directly from DVD/ISO to flash drive. It will take forever, and burn up your drive. Instead, extract to hard drive first, then copy or cut/paste to the drive. Make sure you do not put the files in a subdirectory or the drive will not boot.

when installing from USB boot and enter bios setup (usually DEL/F2 key on bootup) Find where it lists the hard disk boot order. (usually some kind of boot section) Select hard disks and put the usb drive at the top of the queue with the C drive you install to just below it. Save and exit bios (usually F10).

The installation will now proceed as usual—but faster. You can remove the usb flash drive after the first setup reboot, it won't use it anymore.

Windows XP Pro SP3 Pre-Activated (x86)

Cover Win XP Pro SP3

INFO

Title : Windows XP Pro SP3 Pre-Activated (x86)
Developer : Microsoft
Release Date : April 21, 2008 (Build 2600 : Service Pack 3)
License : Full Version

SCREENSHOTS


MINIMUM SYSTEM REQUIREMENTS
  • CPU : INTEL Pentium 233MHz / AMD 233MHz
  • Version : 32Bit
  • RAM : 64MB
  • HDD : 900MB

DOWNLOAD

Language: English
Size: 622MB

UPLOADS

| Windows XP Pro SP3 Pre-Activated (x86).iso |

FILESCDN

| Windows XP Pro SP3 Pre-Activated (x86).torrent |

NOTE: This release is Pre-Activated

HOW TO MAKE A FLASH DRIVE/USB KEY MANUALLY:
  • Typing "diskpart" (Don't need quotes) at the Start Menu.
  • Typing "list disk" (Don't need quotes) //command to find the drive with appropriate size.
  • Typing "select disk 1" (Don't need quotes) //where the "1" is actually the corresponding number of your USB drive. Make sure you choose the correct flash drive if you have more than one of the same size.
  • Typing "clean" (Don't need quotes) //removes all partitions.
  • Typing "create partition primary" (Don't need quotes) //bootable partition.
  • Typing "active" (Don't need quotes).
  • Typing "format fs=ntfs quick" (Don't need quotes) //can use fat32 if all files on drive are something like 3gb or smaller. You should not need a boot sector on a usb drive, most motherboards allow booting to usb drives.
  • Typing "assign" (Don't need quotes) //command gives the USB drive a drive letter, making it easy to access from Windows Explorer.
  • You are done with diskpart, type "exit" (Don't need quotes).

Then you can copy everything from the Windows XP installation CD/ISO onto the USB key (a simple drag and drop will do). I would not reccommend extracting directly from CD/ISO to flash drive. It will take forever, and burn up your drive. Instead, extract to hard drive first, then copy or cut/paste to the drive. Make sure you do not put the files in a subdirectory or the drive will not boot.

when installing from USB boot and enter bios setup (usually DEL/F2 key on bootup) Find where it lists the hard disk boot order. (usually some kind of boot section) Select hard disks and put the usb drive at the top of the queue with the C drive you install to just below it. Save and exit bios (usually F10).

The installation will now proceed as usual—but faster. You can remove the usb flash drive after the first setup reboot, it won't use it anymore.

Windows ME (x86)


INFO

Title : Windows ME (x86)
Developer : Microsoft
Release Date : September 14, 2000 (Build 4.90.3000)
License : Full Version

SCREENSHOTS


MINIMUM SYSTEM REQUIREMENTS
  • CPU : INTEL Pentium II 300MHz / AMD 300MHz
  • Version : 32Bit
  • RAM : 64MB
  • HDD : 2GB

DOWNLOAD

Language: English
Size: 499MB

UPLOADS

| Windows ME (x86).iso |


PRODUCT KEY: RBDC9-VTRC8-D7972-J97JY-PRVMG

                       H6TWQ-TQQM8-HXJYG-D69F7-R84VM

                       VXKC4-2B3YF-W9MFK-QB3DB-9Y7MB

                       C9TCH-G72Y6-G4DQK-QCQRM-K7XFQ

                       GY9FQ-2J9MR-PM78B-J9JCT-X8RDG

HOW TO MAKE A FLASH DRIVE/USB KEY MANUALLY:
  • Typing "diskpart" (Don't need quotes) at the Start Menu.
  • Typing "list disk" (Don't need quotes) //command to find the drive with appropriate size.
  • Typing "select disk 1" (Don't need quotes) //where the "1" is actually the corresponding number of your USB drive. Make sure you choose the correct flash drive if you have more than one of the same size.
  • Typing "clean" (Don't need quotes) //removes all partitions.
  • Typing "create partition primary" (Don't need quotes) //bootable partition.
  • Typing "active" (Don't need quotes).
  • Typing "format fs=ntfs quick" (Don't need quotes) //can use fat32 if all files on drive are something like 3gb or smaller. You should not need a boot sector on a usb drive, most motherboards allow booting to usb drives.
  • Typing "assign" (Don't need quotes) //command gives the USB drive a drive letter, making it easy to access from Windows Explorer.
  • You are done with diskpart, type "exit" (Don't need quotes).

Then you can copy everything from the Windows ME installation CD/ISO onto the USB key (a simple drag and drop will do). I would not reccommend extracting directly from CD/ISO to flash drive. It will take forever, and burn up your drive. Instead, extract to hard drive first, then copy or cut/paste to the drive. Make sure you do not put the files in a subdirectory or the drive will not boot.

when installing from USB boot and enter bios setup (usually DEL/F2 key on bootup) Find where it lists the hard disk boot order. (usually some kind of boot section) Select hard disks and put the usb drive at the top of the queue with the C drive you install to just below it. Save and exit bios (usually F10).

The installation will now proceed as usual—but faster. You can remove the usb flash drive after the first setup reboot, it won't use it anymore.

Windows 2000 Pro 2011 Edition SP4 Pre-Activated (x86)

Cover Windows 2000 Pro SP4

INFO

Title : Windows 2000 Pro 2011 Edition SP4 Pre-Activated (x86)
Developer : Microsoft
Release Date : September 13, 2005 (Build 2195 : Service Pack 4)
License : Full Version

SCREENSHOTS


MINIMUM SYSTEM REQUIREMENTS
  • CPU : INTEL Pentium 133MHz / AMD 133MHz
  • Version : 32Bit
  • RAM : 64MB
  • HDD : 650MB

DOWNLOAD

Language: English
Size: 566MB

UPLOADS

| Windows 2000 Pro 2011 Edition SP4 Pre-Activated (x86).iso |

FILESCDN

| Windows 2000 Pro 2011 Edition SP4 Pre-Activated (x86).torrent |

NOTE: This release is Pre-Activated

HOW TO MAKE A FLASH DRIVE/USB KEY MANUALLY:
  • Typing "diskpart" (Don't need quotes) at the Start Menu.
  • Typing "list disk" (Don't need quotes) //command to find the drive with appropriate size.
  • Typing "select disk 1" (Don't need quotes) //where the "1" is actually the corresponding number of your USB drive. Make sure you choose the correct flash drive if you have more than one of the same size.
  • Typing "clean" (Don't need quotes) //removes all partitions.
  • Typing "create partition primary" (Don't need quotes) //bootable partition.
  • Typing "active" (Don't need quotes).
  • Typing "format fs=ntfs quick" (Don't need quotes) //can use fat32 if all files on drive are something like 3gb or smaller. You should not need a boot sector on a usb drive, most motherboards allow booting to usb drives.
  • Typing "assign" (Don't need quotes) //command gives the USB drive a drive letter, making it easy to access from Windows Explorer.
  • You are done with diskpart, type "exit" (Don't need quotes).

Then you can copy everything from the Windows 2000 installation CD/ISO onto the USB key (a simple drag and drop will do). I would not reccommend extracting directly from CD/ISO to flash drive. It will take forever, and burn up your drive. Instead, extract to hard drive first, then copy or cut/paste to the drive. Make sure you do not put the files in a subdirectory or the drive will not boot.

when installing from USB boot and enter bios setup (usually DEL/F2 key on bootup) Find where it lists the hard disk boot order. (usually some kind of boot section) Select hard disks and put the usb drive at the top of the queue with the C drive you install to just below it. Save and exit bios (usually F10).

The installation will now proceed as usual—but faster. You can remove the usb flash drive after the first setup reboot, it won't use it anymore.
Windows 98 Second Edition SP2 (x86)

Cover Windows 98 Second Edition SP2

INFO

Title : Windows 98 Second Edition SP2 (x86)
Developer : Microsoft
Release Date : May 5, 1999 (Build 4.10.2222 A : Second Edition)
License : Full Version

SCREENSHOTS


MINIMUM SYSTEM REQUIREMENTS
  • CPU : INTEL Pentium 66MHz / AMD 66MHz
  • Version : 32Bit
  • RAM : 24MB
  • HDD : 355MB

DOWNLOAD

Language: English
Size: 625MB

UPLOADS

| Windows 98 Second Edition SP2 (x86).iso |

FILESCDN

| Windows 98 Second Edition SP2 (x86).torrent |


PRODUCT KEY: HQ6K2-QPC42-3HWDM-BF4KJ-W4XWJ

                       VMJD9-WY4XK-9BFJD-9XV69-GHGK6

                       DMGW7-3XBTD-3VV7C-83RQD-KHX66

                       M9W3X-RJD63-2WFRH-72X6G-HXD36

                       XPH76-H46HM-QVF6F-H444T-QM7MW

                       B6G6Q-H29Y9-4KTV8-QBQG2-FMKFM

                       DCWVC-VFR84-TX9X4TDCWC-JWB96

                       HQ23F-WXWFF-7V3HJ-KCVXT-4FRRM

HOW TO MAKE A FLASH DRIVE/USB KEY MANUALLY:
  • Typing "diskpart" (Don't need quotes) at the Start Menu.
  • Typing "list disk" (Don't need quotes) //command to find the drive with appropriate size.
  • Typing "select disk 1" (Don't need quotes) //where the "1" is actually the corresponding number of your USB drive. Make sure you choose the correct flash drive if you have more than one of the same size.
  • Typing "clean" (Don't need quotes) //removes all partitions.
  • Typing "create partition primary" (Don't need quotes) //bootable partition.
  • Typing "active" (Don't need quotes).
  • Typing "format fs=ntfs quick" (Don't need quotes) //can use fat32 if all files on drive are something like 3gb or smaller. You should not need a boot sector on a usb drive, most motherboards allow booting to usb drives.
  • Typing "assign" (Don't need quotes) //command gives the USB drive a drive letter, making it easy to access from Windows Explorer.
  • You are done with diskpart, type "exit" (Don't need quotes).

Then you can copy everything from the Windows 98 SE installation CD/ISO onto the USB key (a simple drag and drop will do). I would not reccommend extracting directly from CD/ISO to flash drive. It will take forever, and burn up your drive. Instead, extract to hard drive first, then copy or cut/paste to the drive. Make sure you do not put the files in a subdirectory or the drive will not boot.

when installing from USB boot and enter bios setup (usually DEL/F2 key on bootup) Find where it lists the hard disk boot order. (usually some kind of boot section) Select hard disks and put the usb drive at the top of the queue with the C drive you install to just below it. Save and exit bios (usually F10).

The installation will now proceed as usual—but faster. You can remove the usb flash drive after the first setup reboot, it won't use it anymore.